

The bedroom door frame had a perfect quarter-inch gouge in it the day I signed the lease. Not because the previous tenant was rough. Because I was. I was carrying a floor lamp through the doorway, my grip slipped, and the metal base hit the white painted wood at exactly the angle that pops a chip off.
I looked at it. I told myself I would fix it later. Later turned out to be three years of renting, three apartments, and one very specific lesson about what landlords actually check on move-out day.
This article is not a list of six door frame fixes. It is the three stages I went through, the cheap tools that actually worked, the expensive ones that did not, and the standard my landlord used when she walked through with her clipboard. If you only have one weekend before move-out, skip to stage three. If you have a year, start at stage one and stop when the ding stops bothering you.
Stage 1 — Moving In: The 5mm Chip That Started Everything
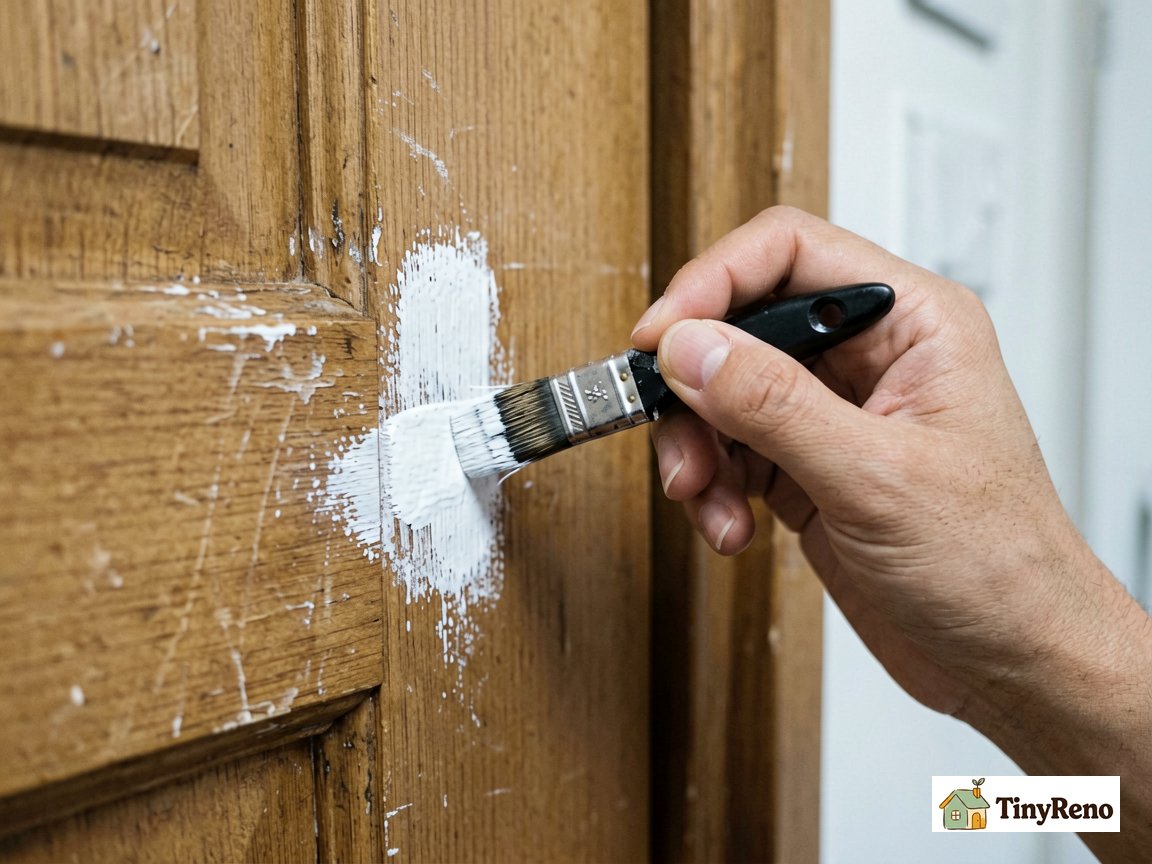
The first gouge was tiny. Five millimeters wide, three millimeters deep, with a small flap of white paint still attached at one edge. I figured I could fix it in five minutes — same overconfidence I had when I tried to patch a small drywall hole by myself and ended up making it worse before making it better. I was wrong for two reasons.
First, I tried the toothpaste trick from some Reddit thread. Toothpaste, baking soda, a dab of white nail polish. The toothpaste turned the chip into a chalky gray crater. The baking soda did nothing. The nail polish was the wrong shade of white and dried into a yellow-tinged lump that made the chip look worse than before. I scraped it all off with a wet rag and spent twenty minutes feeling like an idiot.
Second, I had no idea what "white" actually meant. White paint comes in at least seven shades that all look identical under fluorescent store lighting and completely different against the actual wall in your actual apartment. The previous tenant had painted the frame with a generic interior semi-gloss that was probably a five-dollar can from the hardware store. My nail polish was a warm cream-white. My toothpaste patch was cool gray-white. Against the actual frame, both looked like a small wound.
The thing that worked was boring and cheap. A $4 pack of 220-grit sandpaper from the dollar store. A $8 small bottle of white paint pen labeled "touch-up" at the hardware store. Forty-five minutes of patience.
Sand first, very gently, just enough to knock down the rough edges and feather the paint chip so it does not stick out. Do not sand into the bare wood. You are not stripping the frame, you are just smoothing the transition. Wipe with a damp cloth. Let it dry. Then dab the paint pen into the chip in thin coats, waiting ten minutes between each. Three thin coats beat one thick coat every time. The thick coat sags, dries bumpy, and takes twice as long to cure.
By the end of the afternoon, the chip was invisible from three feet away. From one foot, in direct raking sunlight, you could see it was slightly off. I left it. It did not bother me. I had just learned my first lesson: a door frame fix does not need to be perfect. It needs to be invisible from where the landlord will actually look, which is from the doorway at eye level.
Stage 2 — One Year In: The Cat's Contribution
The cat arrived in month four. By month eight she had carved three vertical scratches into the living room door frame, each about three inches long, two of them down to bare wood. The stage-one chip had not bothered me. These three marks bothered me every single time I walked through the door.
I tried the same paint pen trick. It failed. The scratches were too deep and too long for a pen. The pen tip could not get into the groove without flooding the surrounding paint, and three coats of pen paint in a scratch groove looks like a worm made of caulk.
What actually worked was a different toolset. A $12 small artist brush from the craft store, size 2 round, meant for watercolor but perfect for detail work. A $6 foam brush for the wider second coat. Another $8 bottle of paint, this time the actual small sample pot you can get at any paint counter for five dollars.
The first attempt, I tried to repaint the entire vertical strip from floor to door height. That was a mistake. Even with the closest possible color match, a full strip of fresh paint reads as "fresh paint" to the eye. The frame now looked like it had been attacked with a paint roller. The landlord would notice in half a second.
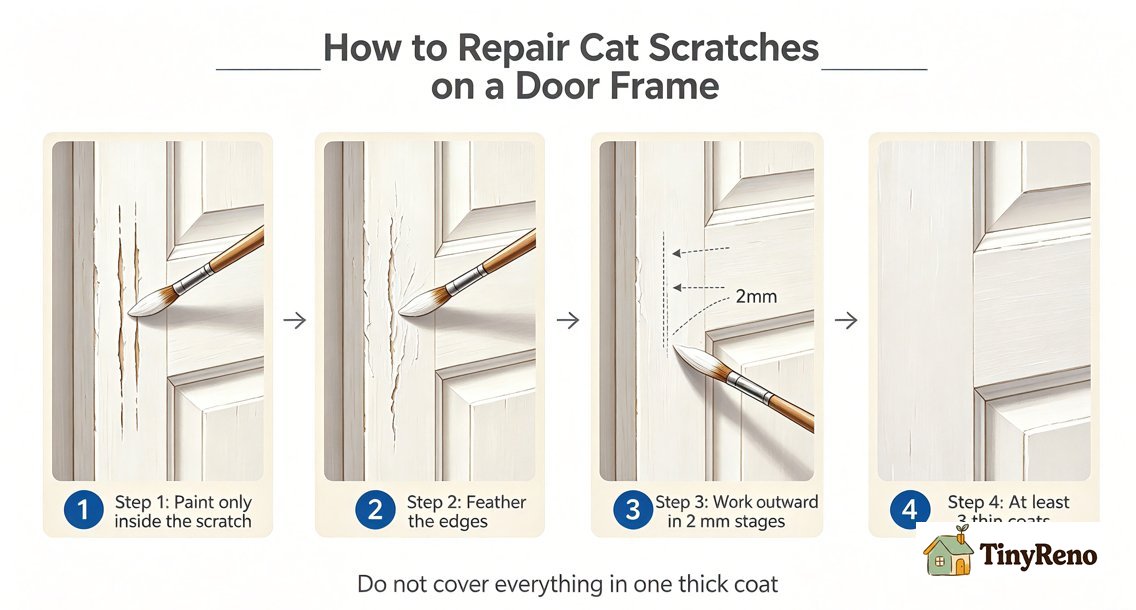
The second attempt, I learned the trick that actually saved the deposit later. Paint only inside the scratch. Feather the edges with a nearly-dry brush so the new paint blends into the old paint without a hard line. Work in two-millimeter stages from the deepest part of the scratch outward. Do not try to make one coat cover everything. Do three coats minimum.
The other trick was the wood filler. For the deepest of the three scratches, where the cat had dug into the bare wood and the gouge was deeper than the paint could hide, I used a $9 tube of paintable wood filler. Dabs of filler pressed into the gouge with a toothpick, allowed to dry for four hours, sanded flush with 220-grit, then painted with the detail brush. The filler shrinks slightly as it dries, so you have to do two rounds: fill, sand, fill again, sand again. Annoying. Necessary.
By the end of stage two, the three scratches were invisible from five feet. The deep one was still visible from one foot in raking light. I left it. I had learned lesson two: a door frame fix does not need to be invisible to the renter. It needs to be invisible to someone who is not looking for it.
This is also where I started thinking about prevention. I went back later and read every fix for the cat scratched door frame problem and wished I had started there first(../article/id/374478/title/cat-scratched-door-frame-renter-fixes). Once the cat scratches the frame, you fix the frame. Before the cat scratches the frame, you stop the cat. I should have done both.
Stage 3 — Three Months Before Move-Out: The Full Inspection
Three months before my lease ended, I walked through the apartment with a clipboard and pretended to be the landlord. I checked every door frame in the unit. Six frames total: front door, bedroom, bathroom, kitchen, closet, and the small hallway one that does not actually close but is technically a door.
Five of the six were fine. The bedroom frame from stage one was still invisible from three feet. The living room scratches from stage two were invisible from five feet. The kitchen frame had two small dings from a chair that bumped it during a dinner party. The hallway frame had one scuff from when I moved a bookshelf.
The sixth frame — the front door — was the one I had been ignoring. It had at least a dozen small dings and chips accumulated over three years. A few from moving in. A few from shoes hitting it on the way out. All of them the same micro-damage you learn to handle when you follow the basic paint-room order and understand what actually wears vs what just looks bad. One from the cat trying to climb it — same cat that destroyed three corners of the living room wall before I figured out the aluminum foil trick. The front door is what the landlord sees first when she walks in. The front door is the first thing she checks.
This is where the $50 started to add up.
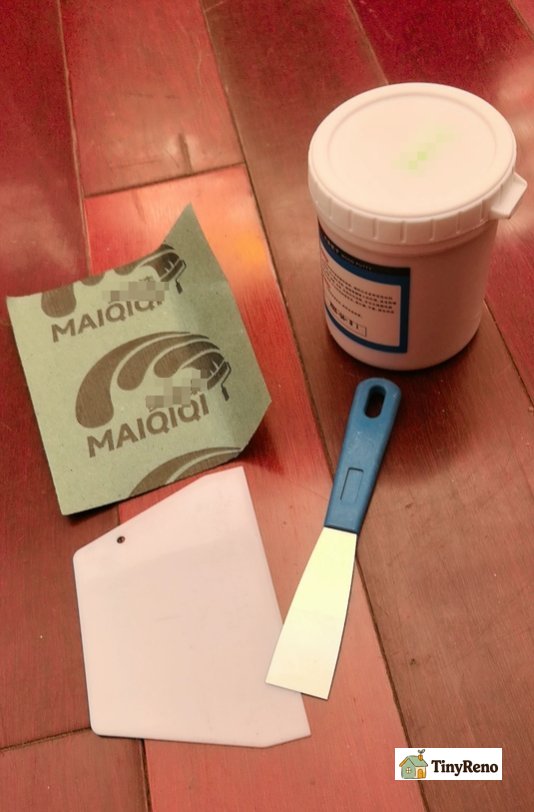
A sample pot of the closest matching white in semi-gloss. $12. A second sample pot in eggshell, in case the semi-gloss was too shiny. $12. A pack of foam brush heads, size small. $4. A pack of artist brushes, sizes 0 and 2. $6. A tube of wood filler. $9. A pack of 220-grit sandpaper sheets. $4. A small plastic putty knife for the filler. $3. Total at the hardware store: $50.
The technique I used on the front door was the same as stage two, applied to a dozen small areas instead of three large ones. Filler where needed. Sand. Feather. Three thin coats. I worked on the door frame for three evenings, about forty-five minutes each, while watching TV. Not a sprint. A slow pass.
The standard I was working toward was not "looks new." That standard is impossible in a rental you have lived in for three years, and any landlord who insists on it is a landlord you cannot please anyway. The standard I was working toward was "the eye does not stop here." If the eye does not stop at the door frame, the landlord's clipboard does not stop at the door frame.
I tested this by standing in the doorway the way a landlord would stand: straight on, clipboard at chest height, glancing left to right. If my eye slid past the frame without catching on anything, I had passed.
The move-out inspection took eight minutes. The landlord walked through with her clipboard. She paused at the front door for maybe three seconds. She looked at the bedroom frame for one second. She looked at the cat scratches for two seconds. She looked at the kitchen and hallway frames for half a second each. She made one note. She did not tell me what the note said. She gave me my full deposit back the following week.
Eight hundred and twelve dollars. The $50 in supplies and three evenings of work got me $812 back.
What I Won't Do Anymore
A few things I tried along the way that did not survive the test:
Toothpaste, baking soda, or any kitchen product as a paint filler. I tried them in stage one. They look awful, they do not bond to the wood, and they collect dirt after a week. The hardware store is twenty minutes away. Drive to the hardware store.
Nail polish as a paint substitute. The color match is never right. The finish is wrong. It chips off within a month. A real $8 paint pen is cheaper than a $12 bottle of nail polish and lasts ten times longer.
Trying to repaint an entire door frame strip to "even it out." I tried this in stage two. The fresh strip is more visible than the original scratches. The eye reads uniform color and assumes new paint. The eye reads mixed color and assumes wear. Wear is invisible. New paint is not.
Waiting until the week before move-out. Three months out was almost too late for me. The cat scratches took two rounds of filler, two rounds of sanding, and three coats of paint. Each coat needs at least four hours of cure time, longer if the apartment is humid. If you start with one week to go, you will be force-drying paint with a hair dryer and hoping the landlord does not touch it.
The Standard That Actually Matters
Landlords do not check door frames the way a painter checks them. Painters look for color match, brush stroke texture, and coverage uniformity. Landlords look for "does this look like damage I can charge for." Those are not the same standard.
A door frame that has been lived in for three years is allowed to look like a door frame that has been lived in for three years. A door frame that has obvious chips, gouges, or fresh paint slashes is what gets charged.
The target is not a perfect door frame. The target is a door frame that has aged the same way the rest of the apartment has aged. A few small dings blend in. A dozen unfixed dings do not. A single perfect paint patch in a sea of wear looks suspicious. A door frame that matches the rest of the apartment's wear pattern looks like someone took care of it.
If you have a year, fix the dings as they happen. The single most useful habit is dabbing a chip the day it happens with a $8 paint pen. Most chips never get worse and most get less visible over time as the edges wear smooth.
If you have three months, walk through with a clipboard. If you have one week, do only the front door — that is what the landlord checks first.


Discussion (0)
Sign in to join the discussion