

I helped my roommate repaint his living room last month. He went in excited, came out with paint splotches on the wall that had dried stiff by 3pm — and the only fix was to peel them off with a putty knife, sand the spot, and redo the whole coat. Total extra time: 4 hours. He wasn't incompetent. He just didn't know the order. After that day I wrote down the exact sequence I use every time, because once you see it, you'll never paint out of order again.
7 steps. 1 rule that decides everything else. And 3 things most guides tell you that I've never actually done on a real room.
1. Tape and Drape First (30 min, don't skip)
Painter's tape goes on every edge where two surfaces meet — ceiling line, window trim, door frame, baseboard, and the lip of any outlet covers you didn't pop off. Drop cloths go on every inch of floor. Furniture slides to the center and gets a single sheet over it. If your room has carpet, tape the cloth down so it doesn't migrate when you walk on it.
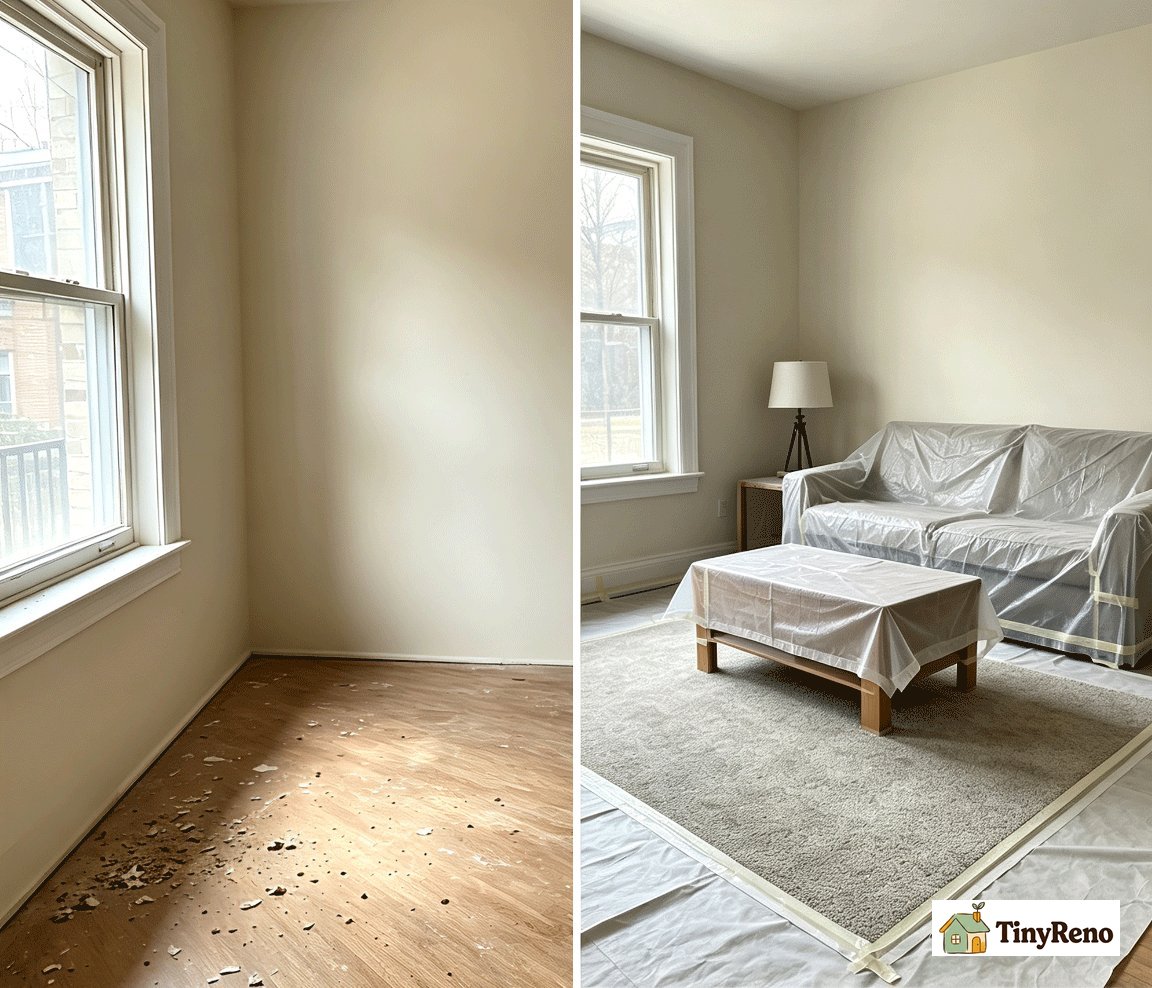
Why first: every step after this depends on tape being in place. If you start rolling and realize you forgot to tape the window trim, you'll either stop mid-job (kills your wet edge) or keep going and spend an hour with a razor blade later. The 30 minutes you invest here saves 2 hours of cleanup.
A renter caveat: if your lease says you can't use painter's tape on the wall surface (some do, because it can lift existing paint), only tape the trim and ceiling line — never the wall itself. I learned this after pulling a 1-inch strip of original paint off a wall in my second apartment.
2. Cut In the Ceiling Edge (brush work, 15 min)
"Cutting in" means painting a 2–3 inch narrow strip along ceiling lines and corners — spots a paint roller cannot reach. Grab a 2.5-inch angled sash brush. Load paint onto the brush, tap off excess paint, then draw steady straight lines. Paint only using the edge of the brush, never press the brush flat against the surface. Pressing it flat will create wobbly edges that stay visible even after you roll the rest of the ceiling.
You always cut in before rolling ceiling sections for one key reason: brush-applied edge paint dries faster than roller paint. This way, your trimmed edges and rolled ceiling areas will dry at roughly the same pace and accept a second coat evenly. If you roll the entire ceiling first and cut in corners last, the rolled paint will start drying while your trimmed edges remain sticky, leaving obvious lap marks where brush paint and roller paint overlap.
The biggest mistake I made on my first ceiling paint job: I cut in a full 4-foot strip all at once before rolling anything. Those trimmed edges dried completely before I could roll up to them, and a faint permanent seam still shows on my bedroom popcorn ceiling today.
Stick to this rhythm: cut in 2–3 feet of edge, roll that section immediately, then move on to the next 2–3 feet of trim. Never cut more edge than your roller can cover while the paint is still wet.
3. Roll the Ceiling (full coverage, 20 min)
Use a 9-inch roller with a 3/8-inch nap for smooth ceilings, 1/2-inch for textured. Pour ceiling paint into a tray, load the roller, and roll in a W pattern — then back-roll without reloading to even it out. Work in 4×4-foot sections. Roll parallel to the shortest wall so any roller marks read less obviously against the window light.
Ceiling paint is almost always flat — it hides imperfections, doesn't reflect light, and forgives uneven pressure. If the ceiling looks splotchy after a job, it's almost always the wrong roller cover or paint loaded too heavily in one section.
Why ceiling first, period: ceiling paint will drip. Some drips will land on your walls. If you roll the walls first, those drips dry into the wall surface and you have to sand them off before the wall coat. If you roll the ceiling first, the wall coat (step 4-5) covers every drip automatically. The drip is not a disaster — it's just physics you plan around.
4. Cut In the Walls (corners and edges, 20 min)
Same brush as the ceiling — 2.5-inch angled sash. Cut in along the ceiling line you already painted (so any overlap gets covered by the wall roll), down both corners, around windows, around door frames, and around outlet covers. The brush line should be clean enough that you can roll within 1/8 inch of it without leaving a visible gap.
Don't cut in the baseboard edge yet. You'll do that in step 6 with the trim paint. If you cut in the wall-to-baseboard edge now with wall paint, you'll have to re-tape or re-brush it when the trim goes on, which adds two steps and a faint line where the two colors meet.
5. Roll the Walls Top-Down (full coverage, 40 min)
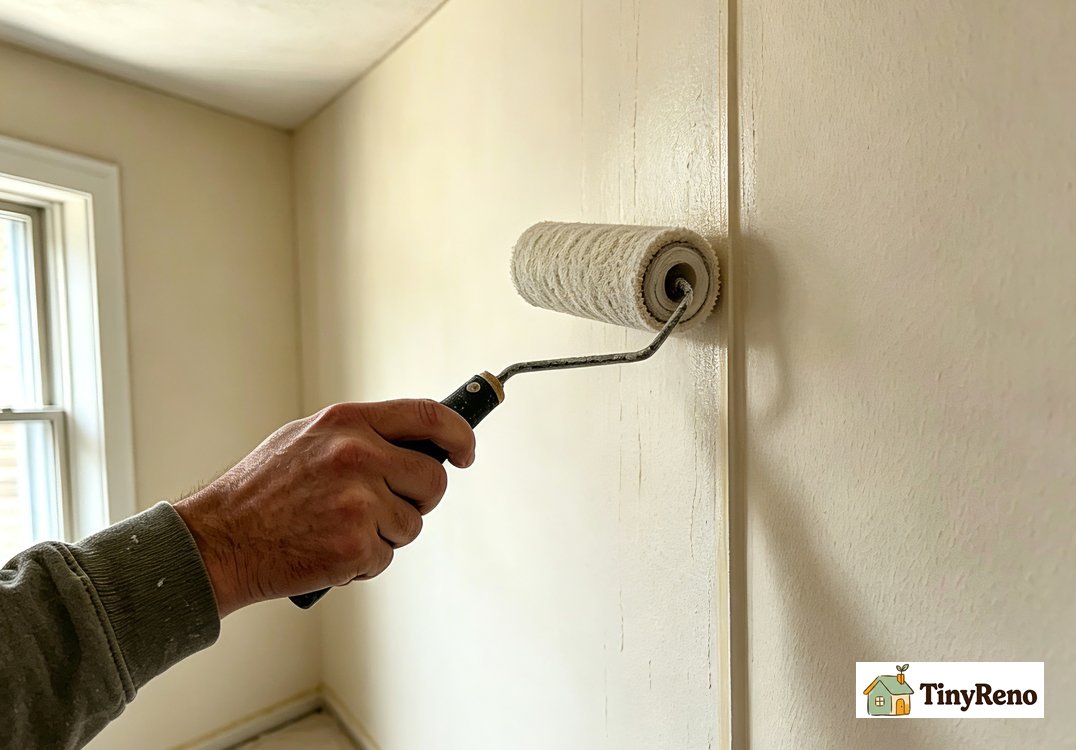
Use a 9-inch roller with a 3/8-inch nap for eggshell or satin walls. Pour wall paint into a clean tray (don't reuse the ceiling tray — flat ceiling paint contaminates the wall finish). Roll in a W pattern, back-roll to even out, work in 4-foot vertical sections. Roll from the top of the wall down — gravity is your friend, and minor drips get rolled into the next pass.
The most common renter mistake: rolling too fast. You want the roller to glide, not bounce. A bouncing roller flicks paint onto the ceiling edge you already cut in, and now you have to touch up the ceiling coat. Slow down to a pace where each forward stroke takes about 2 seconds — paint should leave the roller evenly, not in splatters.
Two coats, not one. One coat looks transparent and shows the old color through it. Two coats is opaque. The 2-hour wait between coats is built into your day if you started at 8am — first coat done by 9am, second coat starts at 11am, room is back together by 1pm. The dry window is also your chance to hang the curtains back up — but pull the rod gently, the anchors are still wet.
6. Paint the Trim Last (window, door, baseboard — 25 min)
Trim is the woodwork: window frames, door frames, and baseboards. Not the walls. Trim paint is usually semi-gloss or satin — it has to be more durable than wall paint because hands touch it, mop water splashes it, and vacuum cleaners bump into it. Use a 2-inch angled brush for window and door frames, a 2.5-inch brush for baseboards.
Why trim is last, not first: trim paint drips. If you paint trim first and then roll the walls, every trim drip on the wall surface has to be sanded and touched up. If you paint trim last, the only thing the trim drips onto is the floor — and your drop cloth (from step 1) catches it. Same physics as the ceiling. Every step is designed so the next step covers the mistakes of the previous one.
The harder renter call: if your baseboards are painted the same color as the walls, you can skip the trim step entirely. Just cut in the baseboard edge with the wall paint. I did this in my last apartment because the original builder painted everything the same off-white. Saved 25 minutes and one brush.
7. Remove Tape While the Paint Is Wet (the 1 rule)
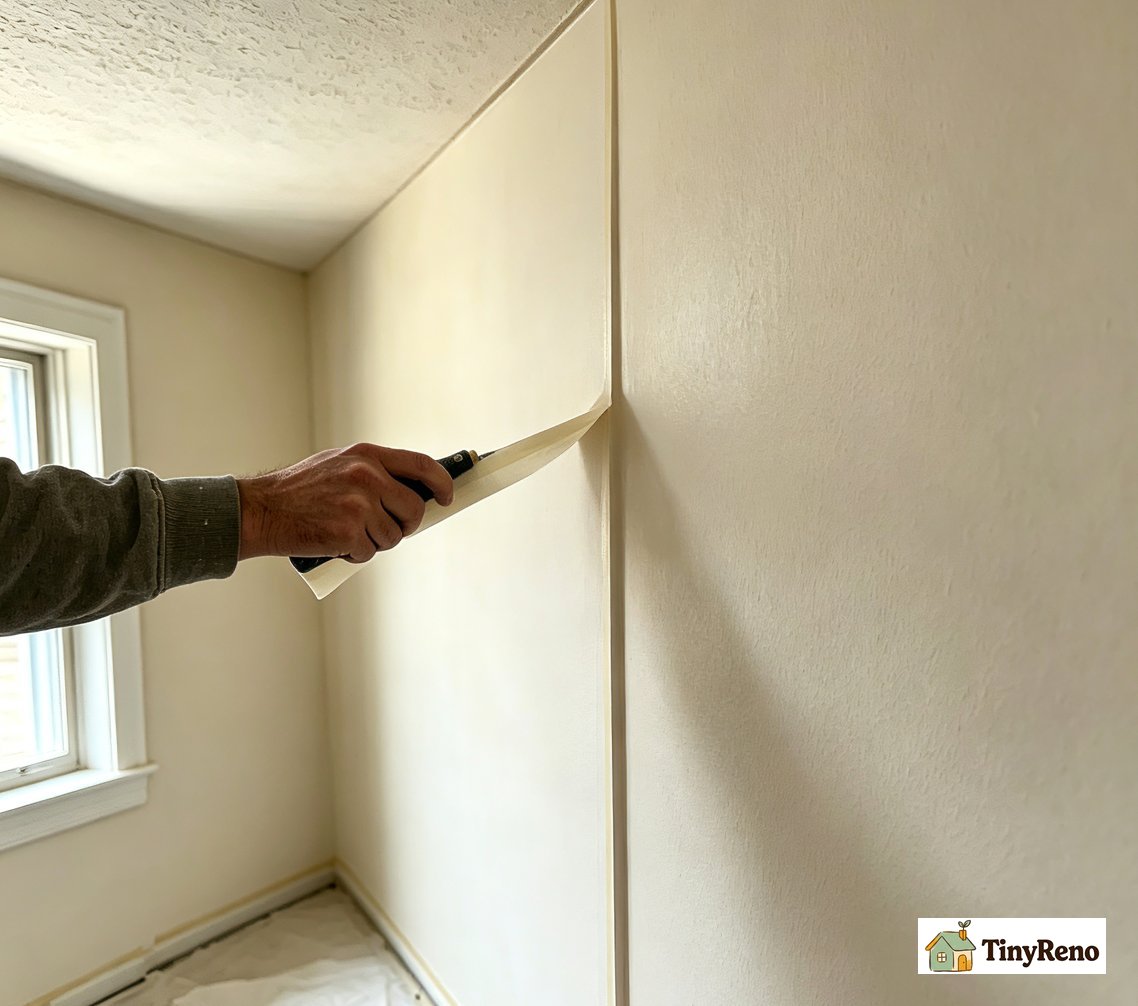
Pull the painter's tape while the paint is still wet to the touch. Not "just dry" — wet. The paint should still feel slightly tacky when you press a finger to it. Pull the tape at a 45-degree angle, slowly, back over itself. If you pull it fast and the paint is dry, the tape brings the paint edge with it and you get a ragged 1/8-inch line where the wall meets the trim.
This is the single rule that decides whether your paint lines look professional or amateur. I waited once — I was tired, told myself "I'll do it tomorrow," and the next morning's tape pull took a chunk of paint off the wall with it. I had to spot-sand, spot-prime, and repaint that section. Don't wait.
If the tape dries on: score the edge with a razor blade first, then pull. The razor cuts the dried paint film so the tape doesn't bond to it. This works, but on rentals with thin original paint, the razor can dig into the wall surface.
3 Things Most Guides Get Wrong
Reading painting articles online, I keep finding the same three suggestions. Here is what I've actually done, and why I don't follow them anymore.
"Paint the trim first, then the walls." That's the order pro crews with spray rigs use, because their spray fan doesn't drip the way a roller does. For a renter with a 9-inch roller and a 2-inch brush, painting trim first means every drip lands on the wall — and those drips are in semi-gloss paint, which doesn't blend into wall paint. Keep the trim for last.
"Wait until the ceiling is completely dry before painting the walls." The ceiling paint is dry to the touch in 1-2 hours. If you wait the full 4-6 hours that most cans recommend for "full cure," the ceiling edge develops a slightly different texture than where it gets touched by the wall roll — and you see a faint line where the two meet. Once the ceiling is touch-dry, roll the walls.
"Leave the painter's tape on for a few days to protect the new paint." The tape is there to catch the wet paint, not to protect the dry paint. Once dry, the tape is a liability — its adhesive bond to the paint film is stronger than the bond between the paint and the wall. Pull it within 30 minutes of the last coat going on.
The 1 Rule That Decides Everything
Top-down, then bottom-up. Always.
Ceiling first. Paint drips down to the wall. The wall coat covers the drip. The wall paint might drip onto the trim. The trim coat covers that drip. The trim paint might drip onto the floor. The drop cloth catches it. Every step is a safety net for the step above it.
When you read a guide that suggests reversing any of these — trim first, walls before the ceiling, baseboards before walls — ask yourself: what catches the drip? If the answer is "the next step covers it," the order is right. If the answer is "you'll have to sand it off and redo it," the order is wrong. That's the rule.
FAQ
Do I need to paint the ceiling first or the walls first?
Ceiling first, always. Ceiling paint drips. If you paint the walls first, those drips dry onto the wall surface and you have to sand them off before the wall coat goes on. If you paint the ceiling first, the wall coat automatically covers any drips that landed on the wall. The order is not a stylistic preference — it's a physics workaround for the fact that paint drips.
How long should I wait between paint coats?
2 hours for touch-dry in normal room conditions (60-75°F, humidity below 60%). If your room is cold, humid, or has poor airflow, wait 3-4 hours. The can's "recoat time" is a maximum, not a minimum — you can always wait longer. Once the surface is touch-dry (finger leaves no impression), the second coat can go on.
Can I paint a room in one day?
Yes, a 12×12 room with one ceiling color and one wall color takes about 4 hours of active painting, plus 2 hours of dry time between coats. A 9am start puts you back in a fresh room by 5pm. If you only have a half day, skip the second coat and accept that the wall color will look thin in raking light. Two coats is the difference between "I painted this" and "this room looks repainted." While the second coat dries, you can also patch the anchor holes with super glue instead of leaving them for move-out.
What order should a renter paint to get their deposit back?
Photograph the original color before you start (every wall, every corner), use a washable latex paint in a similar light value, and keep the original paint can stored for the reverse. If your lease requires returning the room to the original color, factor that 4-hour job into your move-out budget. The cheapest insurance is using a color that's already close to the wall.
The 4-Hour Painting Checklist
Before you start, run this list:
- Tape every edge, drape everything, slide furniture to center
- Cut in the ceiling edge with a 2.5-inch angled brush
- Roll the ceiling in 4×4-foot sections, parallel to the short wall
- Cut in the walls (corners, window, door, outlets — not baseboard)
- Roll the walls top-down, 4-foot vertical sections
- Paint the trim last (window, door, baseboard) — or skip if same color as walls
- Pull the painter's tape while the paint is still wet
4 hours. 1 room. No ceiling drips. No ragged tape edges. No visible seam between ceiling and wall.


Discussion (0)
Sign in to join the discussion