

How to put a window screen back in? I learned this the hard way last July, with a six-month-old baby who needed the bedroom window open for cross-breezes but couldn't tolerate the mosquitoes that came with it. I yanked the screen out, sprayed both sides, set it on the patio to dry, and then spent forty-five minutes trying to put it back in. I bent one corner. I snapped a plastic tab. I called my downstairs neighbor, who walked up, looked at the screen for three seconds, and slotted it back into the channel in under a minute.
"You've got it upside down," he said. "Spring tabs go on the outside, not the inside." That was the whole problem. If you've ever fought a window screen for the same reason, here are the five-minute reinstalls that work for the three common screen types — without breaking the tabs, bending the frame, or making a deposit-deductible mistake.
Why Window Screens Fall Out (and the 3 Types You'll Meet)
Window screens come out for four reasons, and three of them happen more often in rentals. Knowing which one applies to yours is the difference between a five-minute fix and a replacement screen.
- Spring fatigue. The two small metal or plastic spring tabs on the top corners of most screens wear out after 5 to 10 years of seasonal install/removal. Once they stop compressing properly, the screen no longer grips the channel and slides down on its own.
- Worn or cracked corner tabs. The little plastic corner pieces that lock the screen into the window frame get brittle and snap. Once even one tab cracks, the screen shifts and pops out at the first strong breeze.
- Bent frame from a previous install. Anyone who's forced a screen back in "wrong" has bent the aluminum frame slightly. A bent frame no longer sits square in the channel, so it falls out repeatedly.
- Seasonal storage gone wrong. If you removed the screen in October and leaned it against the wall of the patio for eight months, the bottom rail probably bowed under its own weight. A bowed screen won't seat properly.
The renter warning here is straightforward: don't try to "fix" a broken spring or a snapped corner tab. Both require a new screen. The good news is that landlords in most states are required to provide working screens under habitability clauses, so a broken tab is a maintenance request — not a DIY project. Once the new screen arrives, the next step is figuring out how to put a window screen back in correctly so you don't break the replacement the first week.
Identify Your Screen Type in 30 Seconds
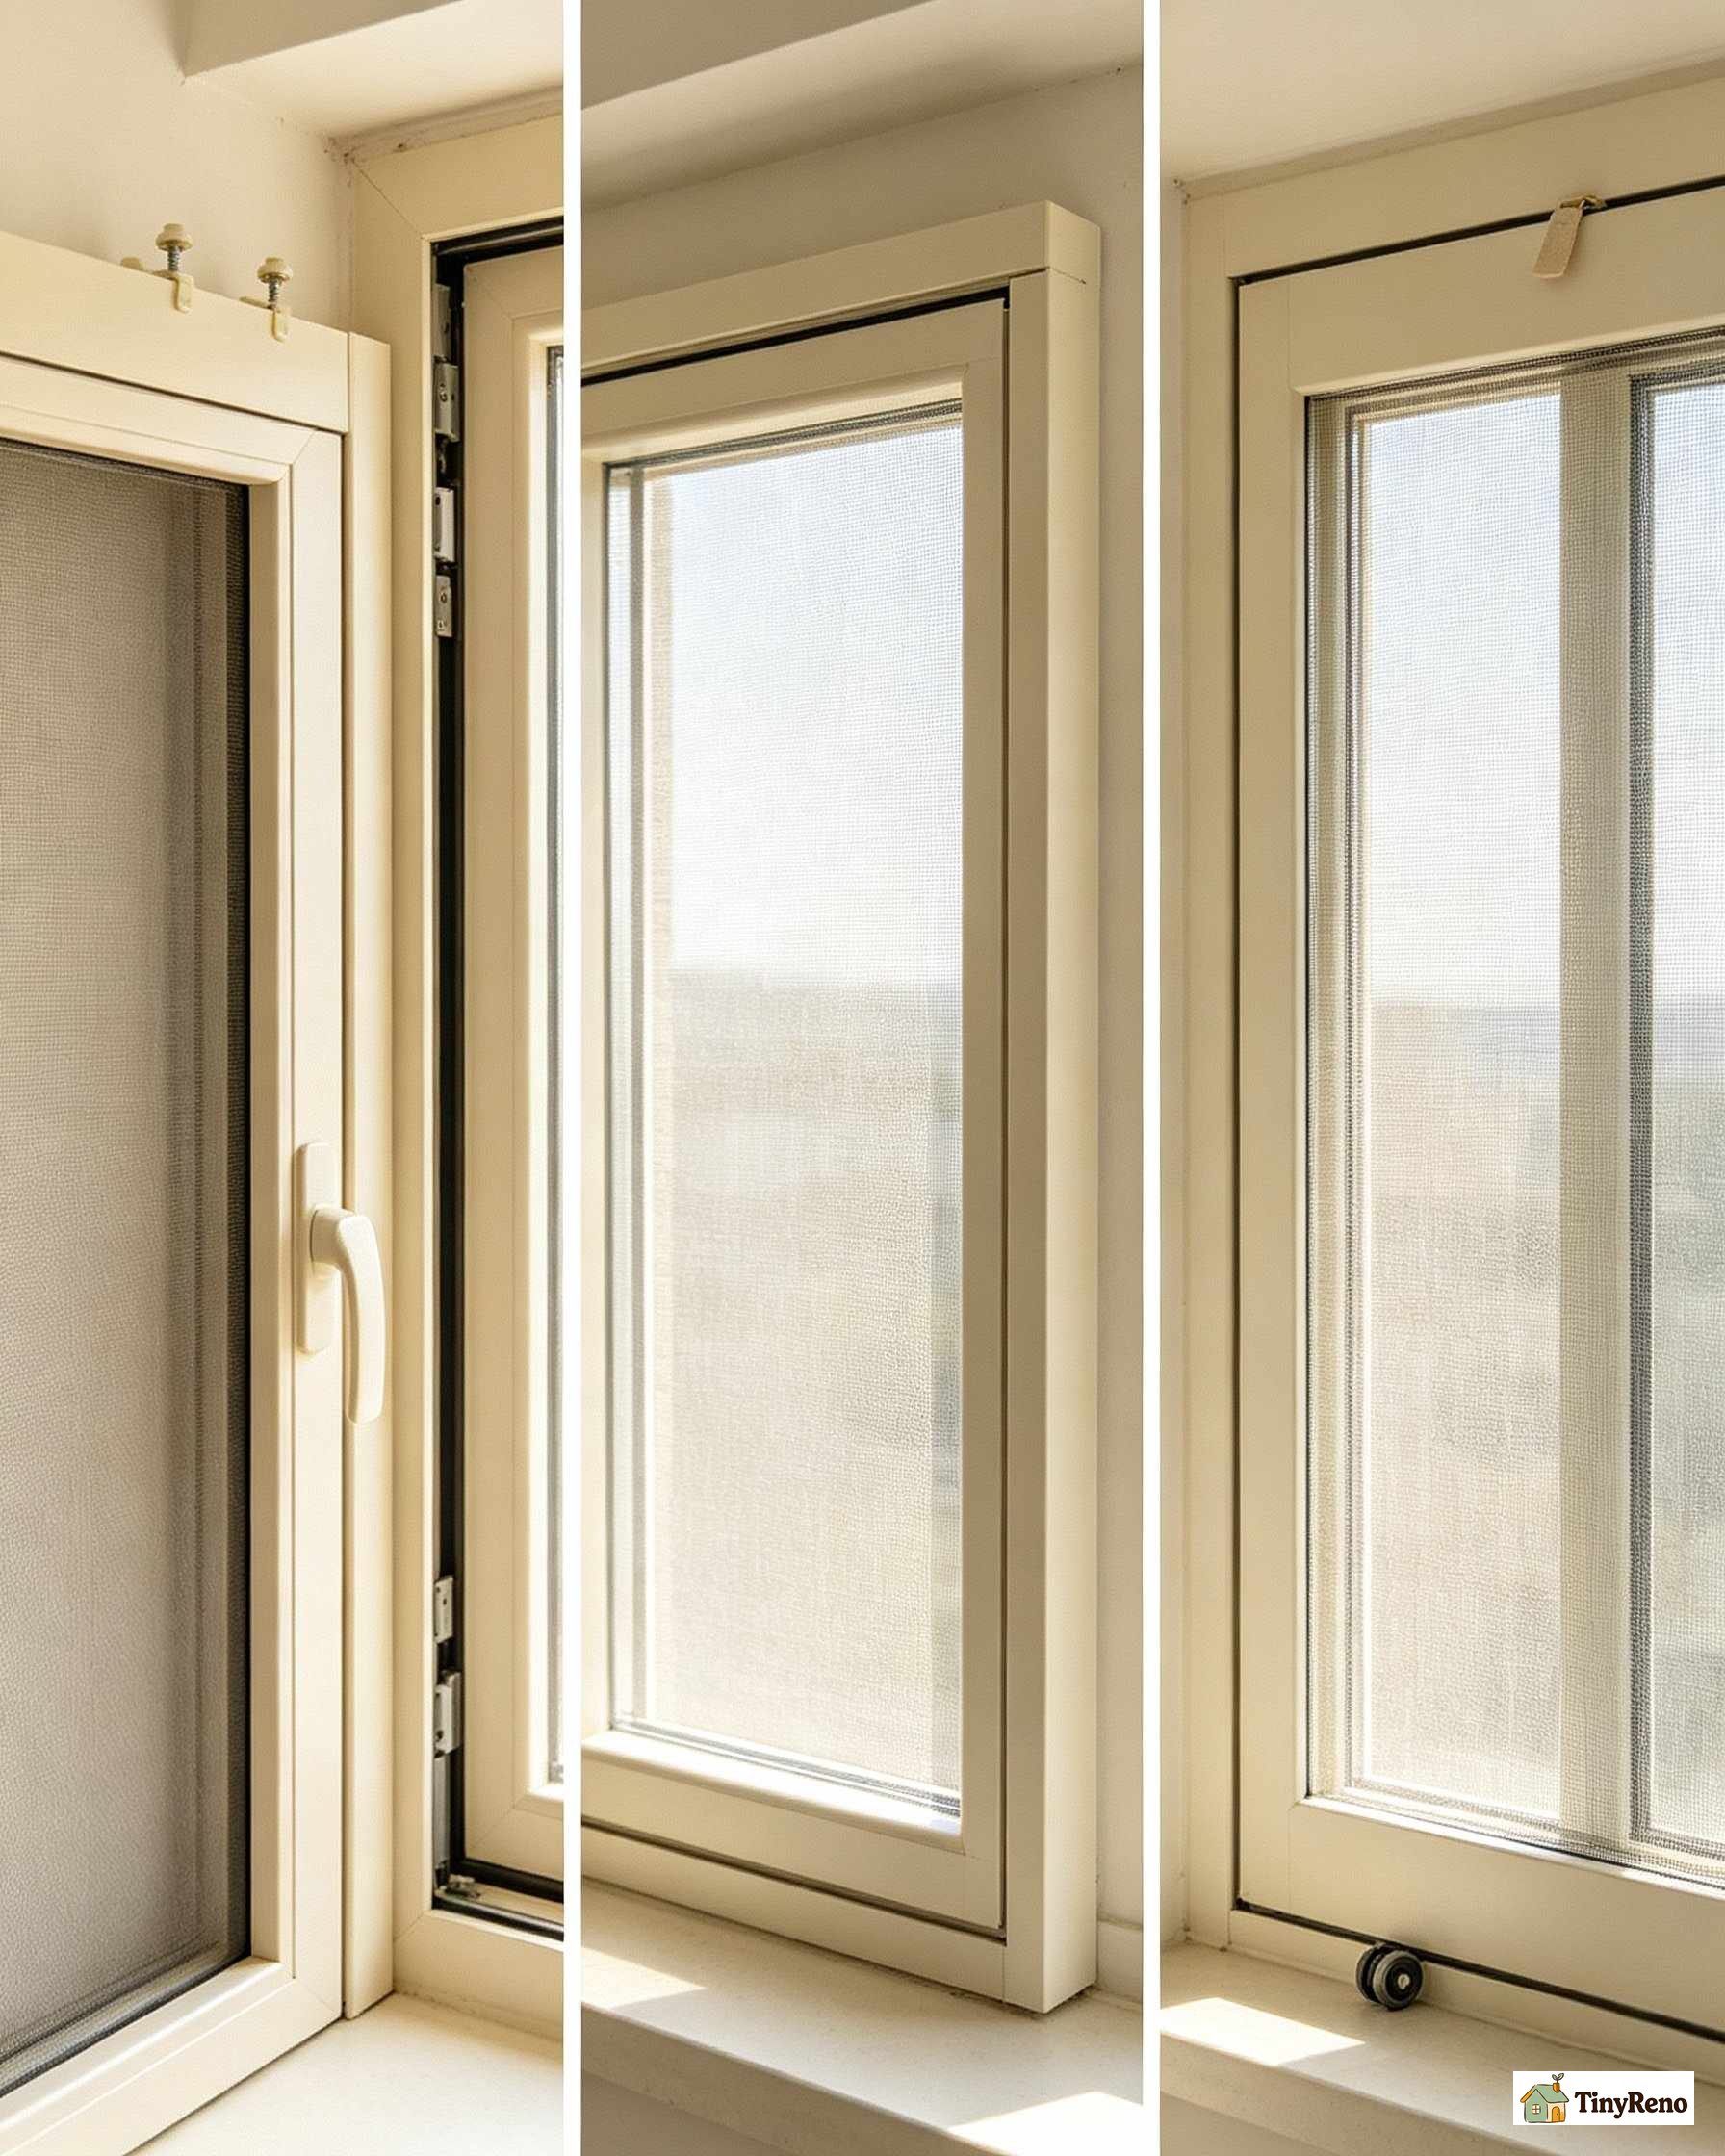
Before you try any reinstallation, figure out which of the three screen types you have. The method method differs for each one, and getting this wrong is the single biggest reason people snap tabs or bend frames.
- Spring-pull screens (most common). Two small tabs — usually metal, sometimes plastic — protrude from the top edge of the screen frame. You you press both tabs inward to compress them, then slot the screen up into the channel. Once inside, you release the tabs and they spring outward to lock the screen in place. This is the type I broke last summer.
- Flat push-in screens (newer vinyl windows). No tabs. The screen simply slides up into a deeper channel and friction holds it. To remove or install, you push straight up with even pressure on both top corners.
- Sliding-door screens (horizontal). Found on sliding glass doors and some large living-room windows. These have wheels or rollers on the bottom edge and a single pull-tab on top. You lift the screen up into the top track, then swing the bottom inward.
Quick check: look at the corners. If you see two small horizontal tabs sticking out near the top, you've got spring-pull. If the top edge is smooth aluminum with no protrusions, you've got flat push-in. If the screen is taller than it is wide (or wider than tall) and has wheels on the bottom, you've got sliding.
The 5-Minute Reinstall (3 Methods by Screen Type)
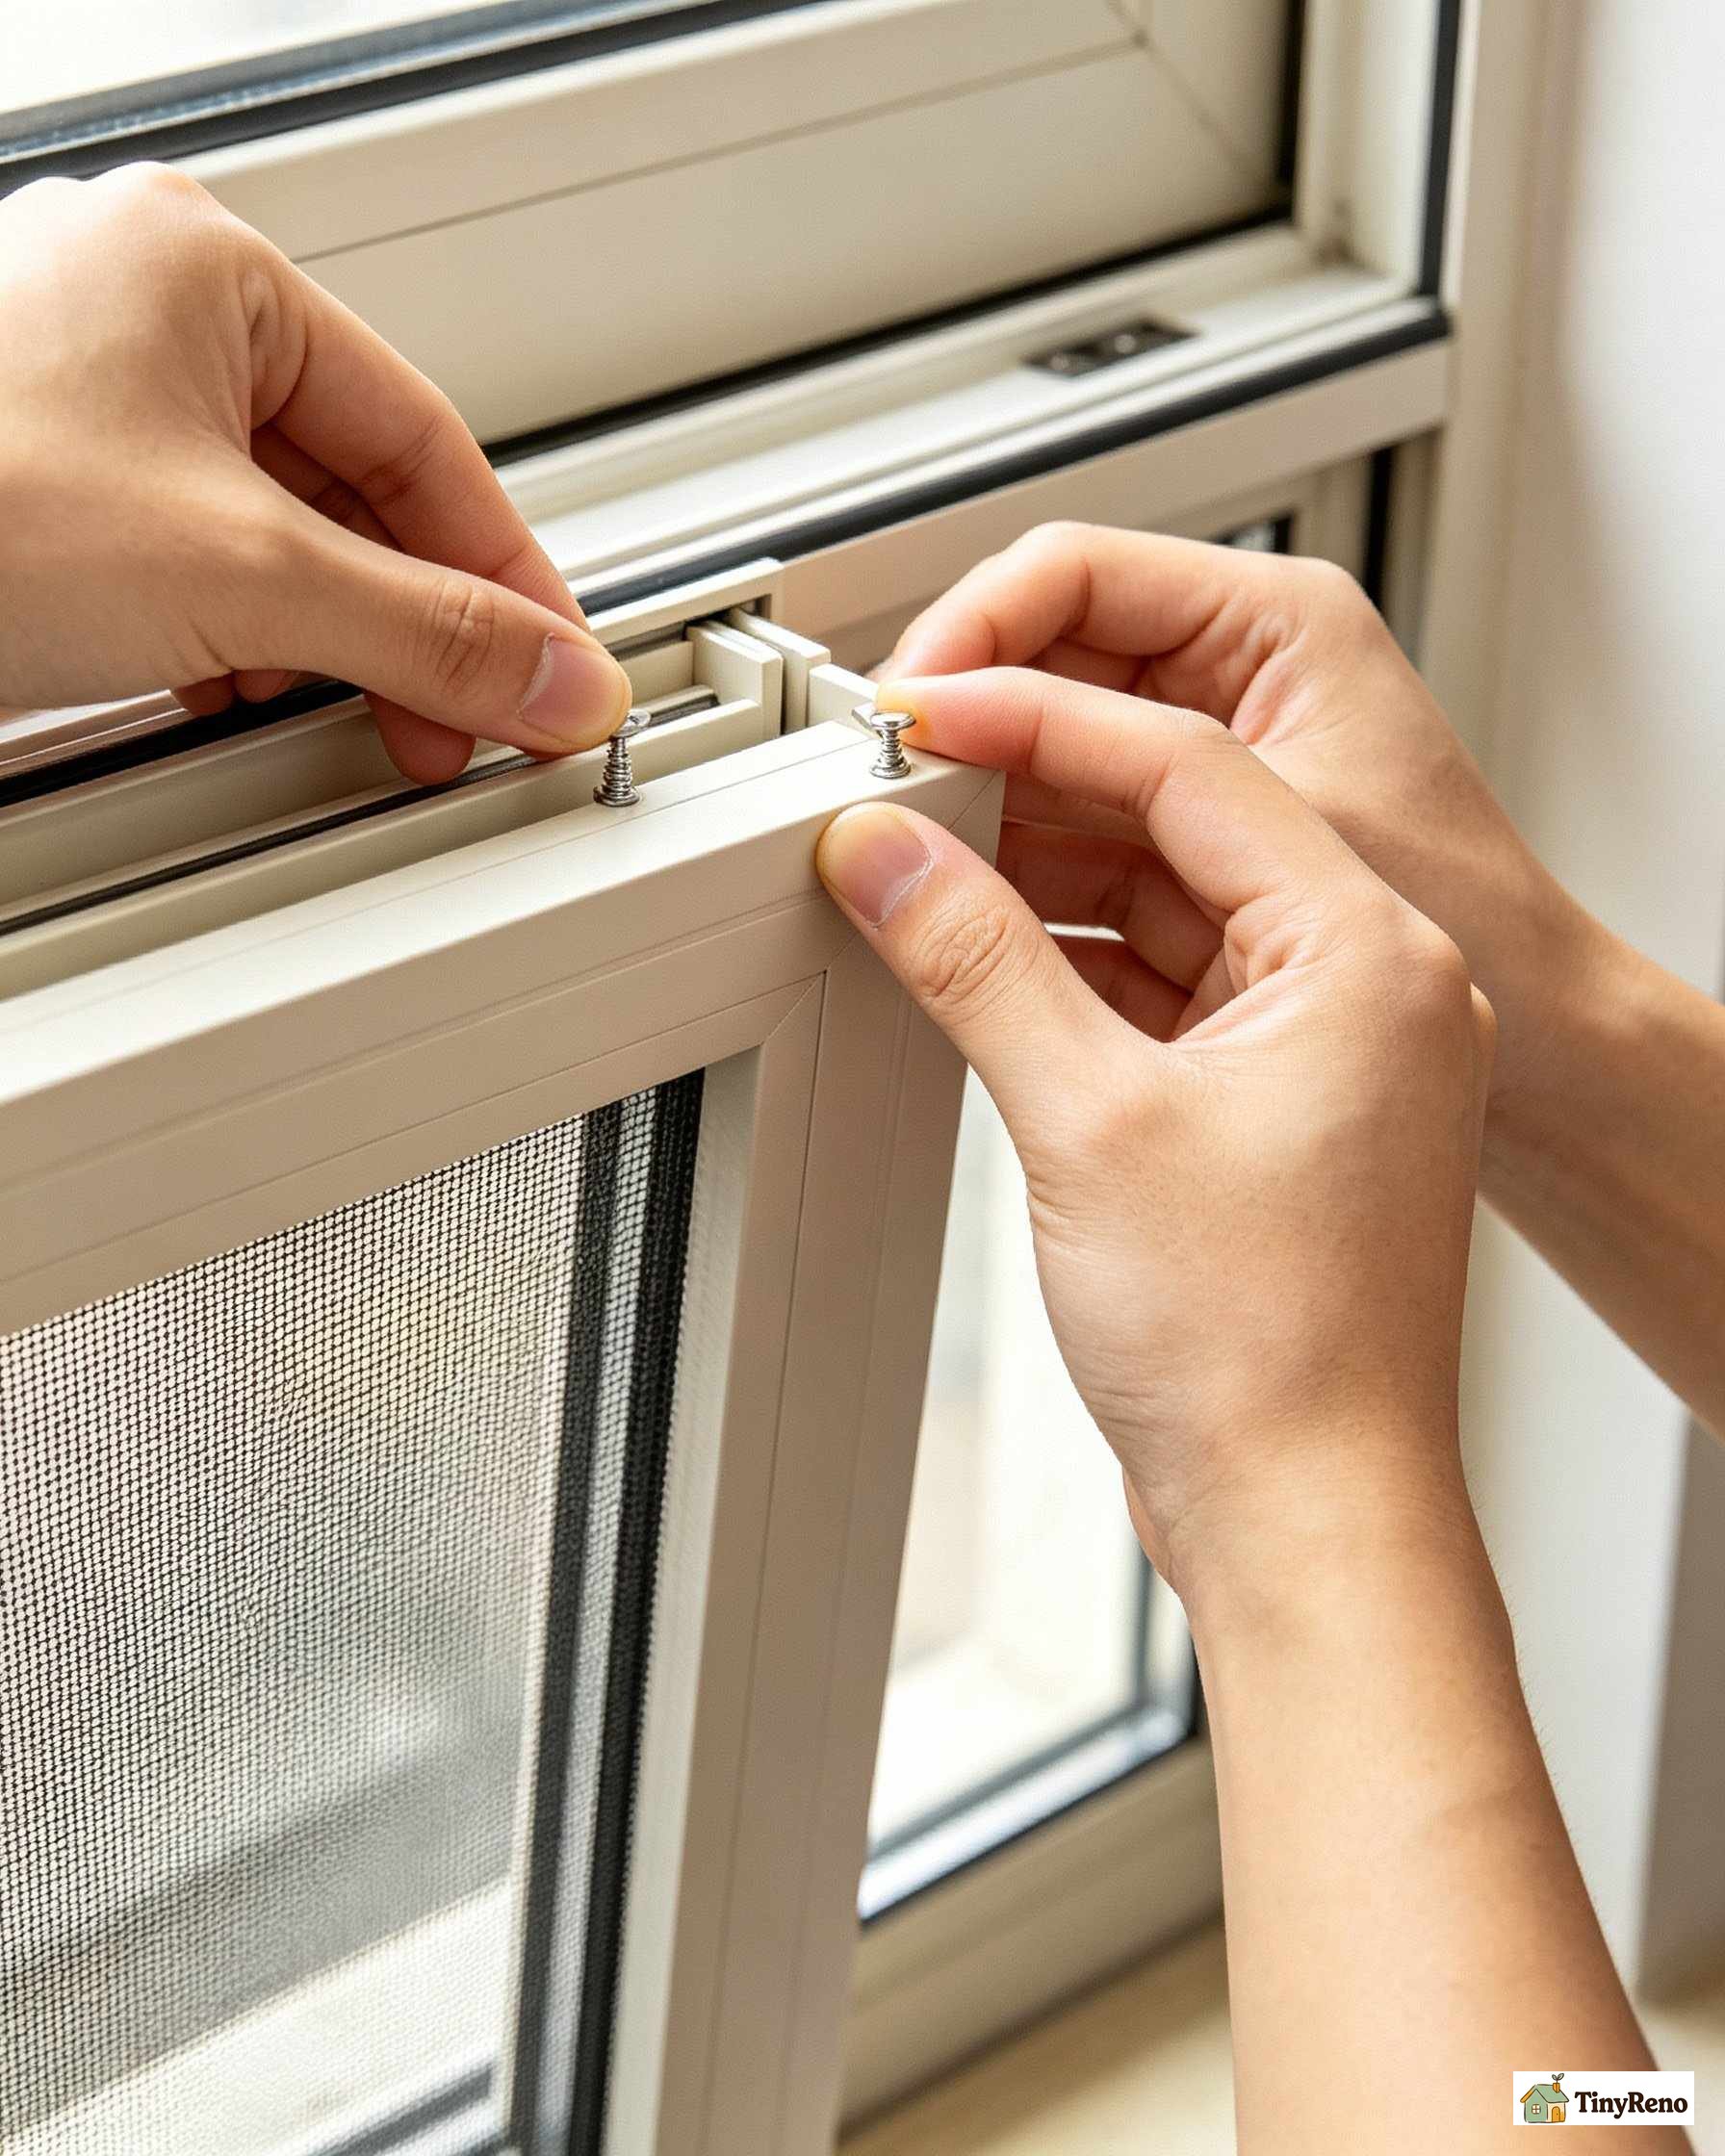
These are in the order I'd try them for the most common screen type. If you have a different screen, jump to your section — each one is self-contained. Whichever method you use, the basic motion of how to put a window screen back in is the same: align the screen, compress any tabs, slide it up into the channel, release the tabs.
Method 1: Spring-Pull Screens (most rentals)
- Stand outside the window. Spring-pull screens install from the outside, not the inside. This is the mistake I made — I was standing inside the room trying to push the screen up into the channel, which is geometrically impossible.
- Hold the screen so the spring tabs face up. The two tabs should be near the top of the screen frame, pointing up. If they point down, you've got the screen upside down.
- Compress both spring tabs inward with your thumbs. You need both tabs compressed at the same time, even pressure. If only one tab is compressed, the screen will tilt and jam in the channel.
- Lift the screen up into the channel. While holding the tabs compressed, slide the screen straight up so the bottom edge goes into the lower channel first, then push the top edge up under the upper lip.
- Release the tabs. The springs push outward and lock the screen into the channel. Pull down gently on the screen frame to confirm it's seated — it should not move.
If the screen doesn't seat on the first try, take it out and check that both tabs are actually compressed. Forcing a partially-compressed tab is what bends the frame.
Method 2: Flat Push-In Screens (newer vinyl windows)
- Clean the channel first. Flat push-in screens need a clean, debris-free channel. Run a vacuum crevice tool along both vertical sides of the channel where the screen sits. If you've already noticed your window not sealing as well as it used to, the channel probably needs cleaning — this is the same logic as dealing with a drafty window.
- Align the screen with the channel. Hold the screen so it's parallel to the window opening, with equal overlap on both sides.
- Push the screen straight up with even pressure. Both palms on the top edge, push straight up. The screen should slide into the channel without any side-to-side rocking. If it sticks, one corner is probably caught on debris.
Method 3: Sliding-Door Screens (large windows + patio doors)
- Lift the screen up into the top track. These are taller than they are wide (or vice versa), so the motion is "up first, then in."
- Tilt the bottom of the screen inward toward you. Once the top is in the track, the bottom edge needs to swing in toward the room. This is the moment most people drop the screen.
- Set the bottom rollers into the lower track. Lower the screen slowly onto the bottom track and confirm the wheels or glides are seated.
- Slide side-to-side to confirm the rollers work. If the screen sticks at any point, one roller is probably off the track. Lift and re-seat it.
The 4 Mistakes That Break the Screen (or Your Deposit)
These are the calls I get from friends after they've already damaged something — or, worse, after the landlord did the move-out inspection and found bent frames.
- Mistake 1: Yanking the screen out by the middle. Always remove screens by pulling on the top corners, never the middle. Pulling the middle bows the frame and the screen will never seat square again. Same logic applies to how you handle any door that's stuck — corners first, never the middle.
- Mistake 2: Installing it upside down. Spring tabs on spring-pull screens almost always go on the outside of the channel, not the inside. If the screen won't seat after two tries, take it out and flip it.
- Mistake 3: Prying with a screwdriver. A flat-head screwdriver between the screen and the channel will absolutely get the screen to seat. It will also scratch the window frame, scratch the screen frame, and leave pry marks that any landlord can spot at move-out.
- Mistake 4: Leaving the screen out for the season and forgetting it. If you remove screens in October for winter, store them vertically — leaning against a wall is fine, but laying them flat invites warping. Screens stored horizontally across sawhorses for six months bow under their own weight and won't go back in.
How to Maintain Screens So They Last
Once you've figured out how to put a window screen back in and it's seated properly, ten minutes of seasonal maintenance keeps it that way.
- Clean the screens once a year. Remove the screen, lay it flat on a tarp, and brush both sides with a soft-bristle brush dipped in warm water with a drop of dish soap. Rinse with the garden hose and let it dry before reinstalling. Doing this prevents the dust buildup that blocks airflow and turns into the grit that wears down your window track. This is also a good moment to spot early window condensation signs on the glass — a different problem, but visible during the same annual cleaning.
- Store screens vertically, not horizontally. In cold climates, remove screens in late October and lean them against a basement or garage wall. Storing them horizontally across two sawhorses is the single fastest way to bow the frame. If your apartment doesn't have storage space, even leaning them against a closet wall is better than laying them flat. Keep them out of direct moisture and avoid humid basements — a dehumidifier running at 40 to 50 percent is the right range.
- Patch small holes immediately. A small tear — even a 1/4-inch hole — turns into a 2-inch hole within a season if left unrepaired. For tiny holes, brush on a thin layer of clear nail polish. For larger tears, screen patch tape from any hardware store works and lasts two to three seasons.
- Check the corner tabs each spring. Once a year, with the screen out, look at all four corners. If any plastic piece is cracked or any spring is no longer compressing, file a maintenance request now — before the screen falls out at 2 a.m. during a summer storm.
When to Just Call the Landlord
There are three situations where the answer is "stop, document, and request maintenance," not "fix it yourself."
The spring tabs are broken or won't compress (replacement screen needed). The frame is bent or warped and won't seat even with the right technique. The corner tabs are snapped off entirely and the screen won't stay in the channel for more than an hour. In all three cases, the screen is no longer functioning as designed and continuing to mess with it usually creates more damage.
Most leases and state habitability laws treat window screens as landlord responsibility. If you're unsure, here's the kind of message that tends to get a quick response:
Subject: Maintenance Request — Window Screen Won't Stay In [Bedroom / Kitchen / etc.]
Hi [Landlord / Property Manager],
The window screen in the [Room Name] has come out of the channel and won't stay seated. I attempted to reinstall it following the original orientation (spring tabs on top, outside of channel) and the screen still falls. I have not forced the screen or damaged the frame. Could you please send someone to assess whether the screen needs replacement or the channel needs adjustment?
Thank you,
[Your Name]
[Unit Number]
[Date]
The screen falling in and out of the channel is one of those issues that seems trivial until it isn't. A working screen keeps mosquitoes out, lets the breeze in, and means you can run a window AC unit without the window being propped open. Once you've got the right technique down, it's a five-minute job that lasts the rest of the season — and the same five minutes is all it takes to remember how to put a window screen back in next fall when you take it out for winter.


Discussion (0)
Sign in to join the discussion