

Three days before Maria's move-out inspection, she called me at 9 p.m. and asked the question this whole article is built around: "how do you caulk baseboards, and can I actually do this in one night?" She had never caulked anything in her life, she had about three hours before she had to pack for the movers, and her landlord was coming through the next morning at 10 a.m. with a flashlight. I walked her through the whole process on speaker while she worked, and at midnight she sent a photo of a clean caulk line along the living room baseboard that looked like it had been done by a contractor. Her landlord returned her full deposit four days later. Here is the six-step SOP I gave her, the four prep steps most people skip, the four common mistakes that would have cost her money, the five questions she asked me on that phone call, and the three-hour emergency version if you are reading this the night before your own move-out.
Six Step SOP From Prep Through Paint Walked Through on a Phone Call
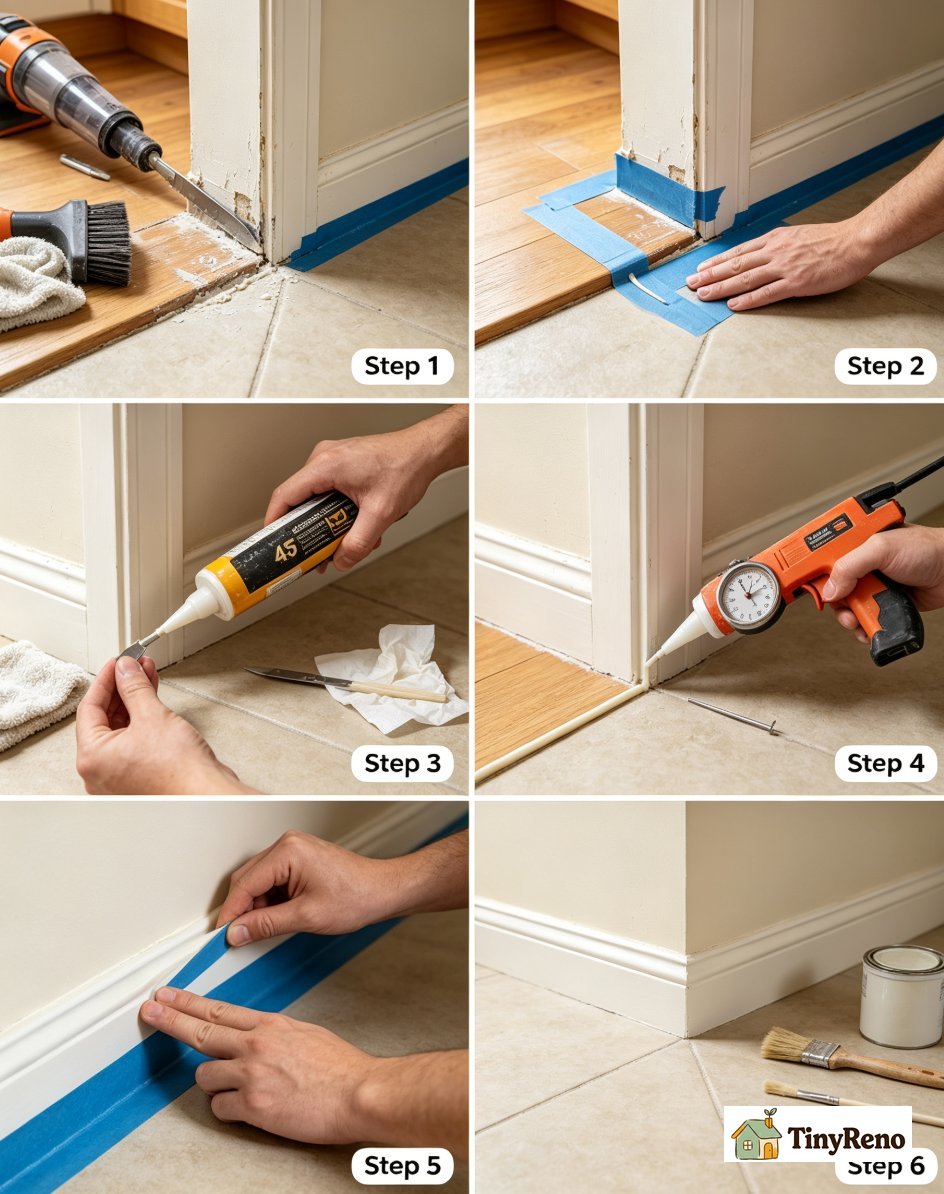
This is the exact six-step SOP I read out to Maria on the phone that night, in the exact order I said it. If you follow these six steps in this order, with the same materials I list, you will get a result that looks professional even if it is your first time. The whole job for an average two-bedroom apartment is about 90 minutes of work and 24 hours of cure time before paint.
Step one, remove any old caulk and clean the gap. If there is old caulk in the gap, slice along both edges with a utility knife and peel it out. Vacuum the gap with a brush attachment. Wipe the wall and the baseboard face with a damp microfiber cloth. Let the area dry for about 15 minutes. Maria had no old caulk in her rental because the apartment had been renovated right before she moved in, so she skipped the removal and went straight to wiping.
Step two, tape the floor and the baseboard. Run a strip of 1.5-inch blue painter's tape along the floor about an eighth of an inch out from the baseboard. Run a second strip along the top edge of the baseboard right where it meets the wall. Press both tape strips down firmly so caulk cannot seep underneath. This step is what makes a beginner's line look like a contractor's line.
Step three, cut the tip at 45 degrees and load the gun. Cut the caulk tube tip at a 45 degree angle, starting with a small opening about an eighth of an inch across. Puncture the inner seal with a long nail or the pin on your caulk gun. Load the tube into the gun. Squeeze the trigger a few times onto a paper towel until the caulk starts to flow smoothly, then you are ready for the wall.
Step four, lay a steady bead along the gap. Hold the gun at a 45 degree angle to the wall. Squeeze the trigger with steady even pressure and pull the gun along the gap at a consistent speed. Aim for a continuous bead that fills the gap without overflowing onto the tape. If you have to stop, release the trigger and lift the gun away cleanly. Do not try to restart mid-gap. Instead, slightly overlap the start of the next bead.
Step five, smooth with a wet finger and remove the tape. Within5 minutes of laying each section, dip your finger in water and smooth the bead with a single light pass. Press just enough to push the caulk into the gap and create a clean concave surface. Immediately remove the painter's tape by pulling it at a 45 degree angle away from the caulk while it is still wet. Pulling tape while the caulk is wet gives the cleanest edge.
Step six, let it cure24 hours before paint. Caulk needs a full 24 hours to cure even if it feels dry to the touch in 30 minutes. Do not paint, do not lean anything against the baseboard, and do not run air conditioning directly at the wall during the cure window. After 24 hours, paint with the same paint used on the rest of the wall and the line between caulk and wall disappears.
Four Prep Steps Most People Skip That Turn a Two Hour Job Into Fifteen Minutes
The reason most people askhow do you caulk baseboards and end up with a result they hate is that they skip the four prep steps. Each one takes less than a minute but together they are what separate a clean line from a smeared mess. These four are also what I emphasized to Maria when she was panicking on the phone, because prep is what makes the actual caulking fast.
Prep step one, tape the floor and baseboard face. The single biggest difference between a first-timer and an experienced caulker is whether they taped. Tape creates a clean edge that no freehand technique can match, and it catches every smudge before it hits the wall. Maria taped first because I told her to. She finished the entire living room in about 40 minutes, including the time it took to apply and remove the tape.
Prep step two, cut the tip at 45 degrees, not straight. A straight cut lays a flat bead that smears. A 45 degree cut lays an oval bead that rolls into the gap cleanly. This is a small thing that makes a big visual difference. If you cut straight across, you will spend twice as long smoothing and the result will still look amateur.
Prep step three, match the bead size to the gap. For a gap under an eighth of an inch, use the tip as cut. For a gap between an eighth and a quarter inch, cut slightly more off the tip. For a gap wider than a quarter inch, do not try to fill it with caulk alone. Use a foam backer rod first, then caulk over the top. Caulk alone in a wide gap sags and cracks within months as the caulk shrinks during cure.
Prep step four, practice on a hidden spot first. Before you caulk the visible baseboard in the living room, practice on a baseboard inside a closet or behind a couch. The right speed is slow enough that the caulk fills the gap completely but fast enough that you lay a continuous bead without stopping. Most first-timers go too slow. The bead should look like a smooth rope, not a wavy snake.
Four Mistakes That Cause Caulk Failure and What Each One Costs at Move-Out
Across five rentals and seven caulk baseboards attempts of my own, plus watching Maria's neighbors lose deposits in similar situations, there are four specific mistakes that cause failures. Each one is a thing people do because they think they are saving time, and each one costs between $50 and $150 at move-out if the landlord notices.
Mistake one, skipping the tape. People think tape is overkill for a small gap. It is not. Without tape, the caulk smears onto the floor and the baseboard face, and cleaning the smear takes longer than applying the caulk did. Cost at move-out when the landlord walks the wall with a flashlight: $50 to $75 deduction for "unprofessional finish."
Mistake two, no backer rod in a wide gap. People figure more caulk will fill a wider gap. It will not. Caulk shrinks as it cures, and a thick bead in a wide gap sags within months. Cost at move-out: $75 to $100 deduction plus the visible crack that triggered it.
Mistake three, painting before 24 hour cure. People paint the same day because they need the apartment to look done. The paint looks fine at first, then the caulk continues to shrink underneath and the paint cracks along the caulk line within a week. Cost at move-out: $50 to $75 deduction. The fix is patience, which costs nothing.
Mistake four, using the wrong caulk type. People buy whatever tube is on the shelf without reading the label. Pure silicone caulk cannot be painted. If you paint over silicone, the paint beads up and peels within months. Cost at move-out: $100 to $150 deduction if the landlord decides the wall needs to be repainted. The fix is to spend the extra dollar on paintable latex or siliconized latex caulk.
Five Common Caulk Baseboard Questions Answered in Phone Call Style
Maria asked me five questions on the phone that night that I have heard from almost every first-timer since. Here they are with the answers I gave her, in the order she asked them, so you can hear how the conversation actually flowed.
Question one, what caulk do I actually buy? For most rooms buy paintable latex caulk at $3 to $5 per tube. For bathrooms or kitchen baseboards near water, buy siliconized latex caulk at $5 to $7 per tube. The label will say "paintable" and "interior." Skip the pure silicone unless you never plan to paint over it.
Question two, how long does this take? For a single room of about 40 linear feet of baseboard, about 30 to 45 minutes including prep. For an entire two-bedroom apartment with about 200 linear feet, about 90 minutes including setup and cleanup. The cure time before painting is 24 hours either way.
Question three, do I really need tape? Yes. Tape is the difference between a clean line and a smeared mess. It takes about 5 minutes to apply and remove and saves about 30 minutes of cleanup. If you skip tape, you will spend more time cleaning than caulking.
Question four, can I paint over old caulk? Only if the old caulk is the same type as the new paint can bond to. If the old caulk is pure silicone, no paint will stick. If the old caulk is latex or siliconized latex and is in good condition, you can paint over it after wiping with a damp cloth. If the old caulk is cracking or lifting, remove it first with a utility knife.
Question five, when do I need to call the landlord first? Always. Email your landlord before any caulk baseboards work. Mention the specific rooms and your plan to use paintable latex caulk and repaint to match. Most landlords approve within 24 hours. The email protects your deposit if there is any dispute at move-out.
Three Hour Emergency Caulk Job Before a Move-Out Inspection Plus Two Things to Skip
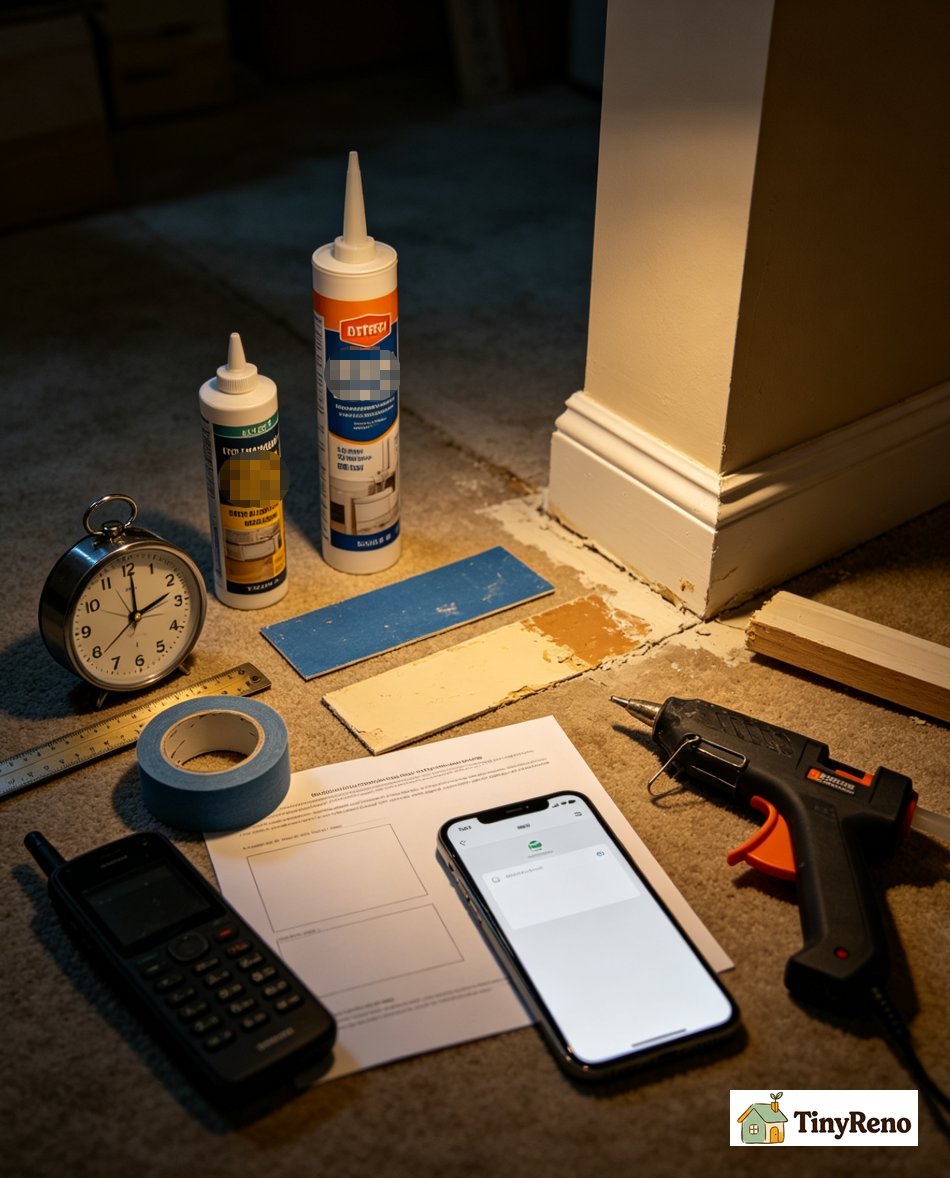
If you are reading this the night before your move-out inspection, here is the minimum viable caulk job. Maria did this in about3 hours the night before her landlord arrived, and her deposit came back in full. Three things must be done. Two things must be skipped. There is no time for anything else.
Must do one, tape every baseboard before you start. Tape is the multiplier. It turns3 hours of careful work into3 hours of fast work. Do not skip this even in an emergency because without it the cleanup alone will eat your whole night.
Must do two, only caulk baseboards where the gap is visible from eye level. Skip the gaps behind furniture. Skip the gaps in closets. Skip the gaps above the kitchen counter. Caulk only what the landlord will see during the walk-through. A living room, a primary bedroom, and the bathroom mirror area is enough for most apartments.
Must do three, smooth with a wet finger and remove the tape while wet. This is what gives the clean line. Skipping the wet finger leaves a rough surface. Leaving the tape on until the caulk dries pulls the caulk off the wall when you remove the tape.
Must skip one, do not repaint. You do not have24 hours. Paint will not dry in 3 hours and will look worse than no paint at all. The landlord is looking at the caulk line, not the paint. A clean caulk line in the existing wall color reads as professional. Smeared paint over uncured caulk reads as panic.
Must skip two, do not caulk wide gaps. If the gap is wider than a quarter inch, leave it. Wide gaps need backer rod and a second coat, which you do not have time for. The landlord is more forgiving of a visible gap than of a sagging caulk mess. Caulk the small gaps cleanly, leave the wide ones alone, and document the wide ones with a photo and an email to the landlord explaining the situation.
The night before a move-out inspection is not the time to learn a new skill. It is the time to do the minimum viable job that protects your deposit. Tape the baseboards, caulk only the visible gaps with a small bead, smooth with a wet finger, remove the tape, and stop. Do not paint. Do not chase the wide gaps. Do not redo anything that does not need redoing. Send the landlord the email the next morning before the inspection so they know you cared enough to ask. That is the whole emergency playbook. Maria did it in 3 hours, the landlord walked the apartment for 20 minutes, and the full deposit landed in her account four days later. If she can do it the night before with no experience, you can do it on a weekend with all the time in the world.
What Maria's Apartment Looked Like Three Days After the Caulk Job
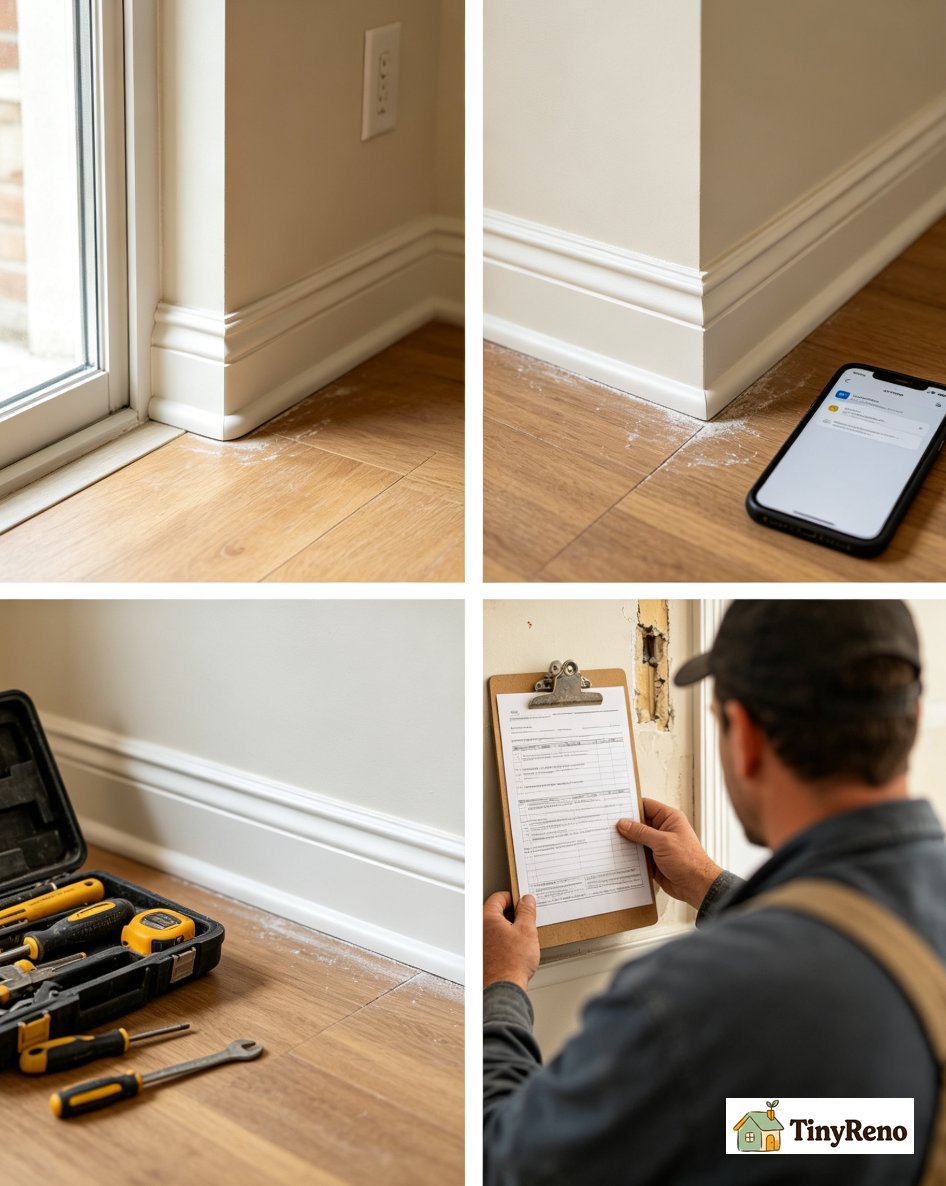
I asked Maria to send me a photo of the living room baseboards three days after the move-out, after the landlord had walked through and given back the deposit. She sent back a clean shot of the corner where the living room meets the hallway, with the caulk line along the top of the baseboard crisp and the paint already touched up to match the rest of the wall. She said the landlord's only comment was "the baseboards look great," and then he handed her a check for the full deposit.
That is the whole point of knowing how do you caulk baseboards the right way. It is not about the caulk. It is about the deposit. The caulk line is what the landlord notices. The caulk line is what stays in the walk-through photos. The caulk line is what tips a $50 to $150 deduction into a full deposit return. Maria learned it the night before, did the minimum viable job, and walked away with her money. If you are about to caulk for the first time, do what Maria did. Tape first, caulk small gaps only, smooth wet, remove tape wet, wait24 hours before paint, and email your landlord. The full deposit is worth the 90 minutes of work.


Discussion (0)
Sign in to join the discussion